LIS 568: Turn Your Library Into a Rainforest

To find the perfect technology to test in this week’s blog post, I went to the Future Ready Librarians Facebook page. What apps do the librarians of today use to teach their students? I did a simple search.  What I found was an elementary school librarian asking what apps to put on her new selection of iPads. Many people mentioned an app called Quiver. I had never heard of Quiver. But it sounded cool, and someone mentioned that kids could “color” on it. The kids go crazy for the coloring pages we print at the library. So I downloaded the app onto my phone to see what Quiver was all about.

Upon research, I found that Quiver is an augmented reality app that can bring coloring sheets to life. As fun as it would be to bring any creation to life, it only works with Quiver coloring sheets that you download online and print. Most are free, but some coloring packs do cost money. This brings me to my first quiver downside. If a teacher wants to do a project based on famous landmarks, maybe they’ll want to use Quiver to bring some of those landmarks to life. They would have to pay to do so. Plus, they’re only limited to the landmarks that Quiver provides. A teacher has to consider the objectives of their lessons first and then see if Quiver can fit those objectives.

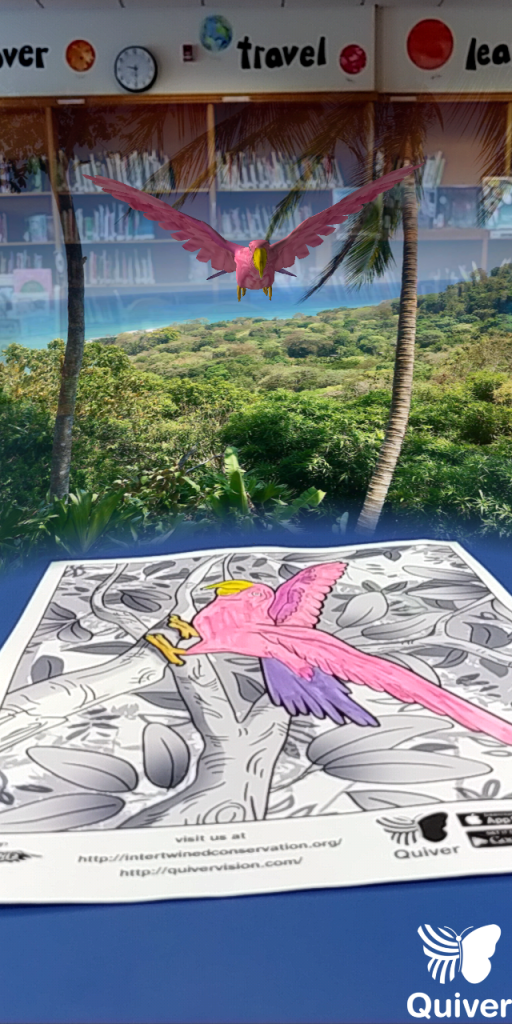
A big pro of Quiver is that I had a lot of fun playing with the app. I could choose to design a Starbucks cup, a sneaker, a car, or a variety of animals. I choose to color a Macaw from a Conservation pack of coloring sheets. Anyone can color with markers, crayons, colored pencils or paints. I grabbed my markers and colored a very lifelike pink and purple macaw. It is Valentine’s Day, after all.

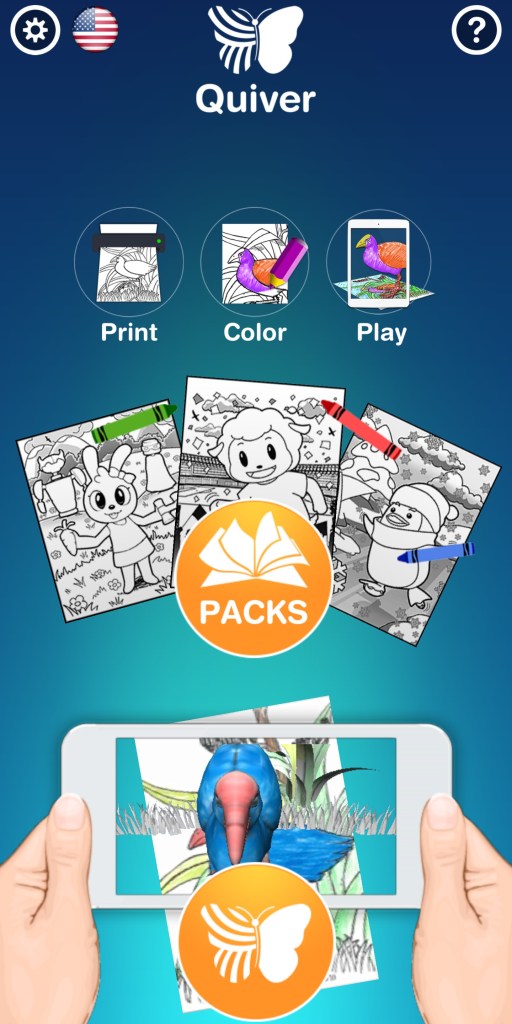
The app itself is very simple. To bring the page to life one just needs to click on a large butterfly icon. A student could easily do this. It connects right to the devices camera. I should note that this app will work if the library has a good budget for iPads or other touchscreen products in their school. A teacher librarian could use a smartphone as well. Once the camera focused for a little while, my pink bird came to life! It cawed like a macaw, while the rest of my library turned into a rainforest. I mean for real, the app played realistic sounds of rainfall, tree leaves, and bird calls.

A student could easily navigate this app. To bring a picture to life, just touch the butterfly icon

Users have some options for how they’ll play with their creations. I could see my macaw feeding a baby bird, sitting on a tree, or actually flying. (However, if your iPad or phone doesn’t focus on the whole page anymore, the 3D object will disappear and you’ll have to refocus. This is a bit of a downside, but something a teacher could work with.) I could easily click and read macaw facts on the bottom of the screen or hear a voice over explain fun macaw facts. That makes this app creative, fun, and educational. This combination makes it a perfect choice for a school library. I can see children loving this app, and getting excited to create something that will look so real in front of them. In classes, we’ve learned that incorporating technology can really motivate students to learn (Scheeren). With this, students can navigate the app on their own and really show off their creativity.

It’s easy to take pictures! Here’s my macaw flying through the rain forest above a table in the library

I can really see this accompanying an elementary library lesson. Use a picture book with fun animals and then bring that animal to life! Teachers and librarians could use this as well for students that are studying biomes and habitats. Since it’s possible to record while using Quiver, they could make videos featuring facts about the animals they’ve colored and the habitats they live in. Students could work individually or in small groups. (Think about the potential to have students write a script or story board. Or to have them cite the places they’ve found their material.) Librarians could also collaborate with teachers to make this work. In secondary schools, students could create their own shoe design companies and curate a brand. A team of students could design a shoe, bring it life, and then present why their design is the best. They can come up with company slogans or political campaigns and then put their words on a promotional Starbucks cup. The possibilities are seemingly endless for this app in all schools.

References

Scheeran, W. (2015). Technology Handbook for School Librarians. Libraries Unlimited.

LIS 568: I Try to Make a Timeline

This week in LIS 568 was the first time I learned about TPACK. We read a Practitioner’s Guide to Technology, Pedagogy, and Content Knowledge (TPACK): Rich Media Cases of Teacher Knowledge. The authors elaborated on a class of third graders who assembled a digital timeline of important historical events based on their prior knowledge. Students worked in groups, and discussed why they thought a person or event belonged at a certain date on the timeline (Hofer et al., 2015). I love the idea of students creating their own timelines to learn give context to historical events while remembering and interacting with important dates in history.

I tried a technology tool that the TPACK authors recommended, Timetoast, to learn how to create my own timeline. I can see this working in school libraries to support curriculum while also influencing the classroom. The only set-back is that a free account with Timetoast is limited. It can only support one user and students and educators could potentially see adds. Teachers that want to use this tool often will most likely have to upgrade.

For this lesson, I imagined I would create a timeline with set dates and movable pictures like the Practitioner’s Guide had explained. Students would move the pictures and events to the correct years. The Timetoast tool is more focused on a user creating their own timelines about any subject. So instead, I created a timeline of events in the American Revolution that students typically learn in Elementary School.

Creating a timeline was easy. To add events, I simply used a button that said “Add event.” I titled the event, typed a description and uploaded a photo. The process was simple and repetitive. If a student was using it, I could see them easily using their own knowledge to add a description of an event. This would allow the student to establish their own point of view on an event. But I can see younger students struggling to continue to use the tool without a lot of instruction and practice. Overall, if teachers are looking for students to create very simple timelines with small descriptions of historical events that add context, this site could work. If they were looking for more customizable timeline features, they could explore other tools here: https://www.commonsense.org/education/top-picks/best-timeline-creators-and-templates

Students can slide the bright blue bar at the bottom to zoom on events and explore
My entry about Paul Revere’s Ride. Compared to another timeline, someone might have a different point of view. That’s a perk of sharing timelines

You can explore my timeline with this link: https://www.timetoast.com/timelines/2178642

A librarian could use this in their space in so many ways. Teachers can create their own timelines for students to view. In elementary schools, this could be a companion to read alouds that involve historical books or biographies. This tool is also a really great way to support the learning that students do in classrooms as they learn more about history. Librarians in primary schools might match a read aloud to what students are learning in class. Then students could create timelines featuring what they learned from the book and what they learned in class. This gives students visuals to what they’re learning about, and also gives them context to see how history wasn’t shaped in isolation. For other activities, students can create timelines of their lives, to learn what timelines are, and to learn about the passage of time.

For secondary classrooms, it would be great to collaborate with teachers to use this tool. Since there is potential to add photos and also descriptions, students would have to ethically cite their sources. Students would grow their knowledge of history and information literacy skills. Students could also publicly publish their timelines so other students could interact with them. This means that groups or individuals could create timelines of different historical periods or events and then share that information. Librarians would facilitate as students teach each other and gain important collaboration skills.

What I also enjoy about this tool is that it can be used with small groups of students collaborating, or used with a whole class with a teacher as a guide. If a librarian notices that students are having trouble using Timetoast or don’t understand the lesson, they can easily change their plan and create a timeline with a whole class.

That’s it for my first blog post and first time trying out Timetoast!

We love APA 7th Edition here at my blog:

References

Hofer, M.J., Bell, L., Bull, G.L., Barry, R.Q., & Cohen, J.D. (2015). Practitioner’s guide to technology, pedagogy, and content knowledge (TPACK): Rich media cases of teacher knowledge. W &M Scholarworks.

Design a site like this with WordPress.com
Get started